Another Developer Blog
Create a Theme
October 30, 2024
If you’ve followed along in the previous two posts, you now have a local copy of Oqtane running on your local device. We are close to publishing it, but first, let’s go over an option to add more custom CSS and style to the site. So far, we’ve used the Bootswatch Theme called Sketchy to be our main theme. I want to add some custom CSS classes to the theme. There are other ways to do this, like adding a <style> tag in the Page Content in the site settings, but in past experiences with websites and themes, best practice is to keep all of that within a theme for the site.
Here are the steps I’m going to go over to create our very own custom theme:
- Created a theme project
- Build and Install Theme
- Adding Custom CSS
The project files for my example theme can be found here on GitHub.
Create a Theme Project
Oqtane has built into its framework, a simple method for creating our theme project. Start by running your local copy of Oqtane from Visual Studio. Log in and open the control panel, then the Admin Dashboard. Select Theme Management.
Then click on the "Create Theme" option at the top of the Theme Management page. Here you will see a form to create your theme and theme project within your own namespace:
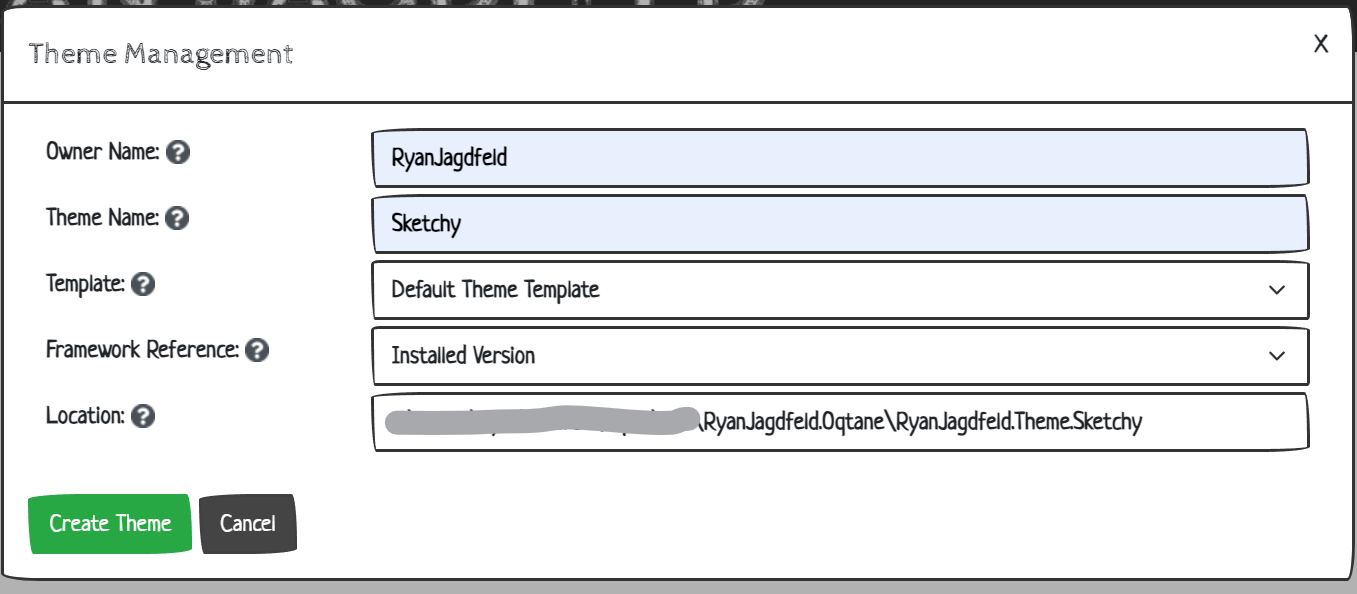
NOTE: I hid the location on my local device simply not to confuse. The folder path you use in your development is your choice.
Click the "Create Theme" button and the page will refresh and you should see a message letting you know to restart the application:

Instead of following the link in the message. Let’s stop our debugger and open our new project.
The location of the project will be one level up from your framework project:

Go into the new theme project folder and open the .sln file found there:

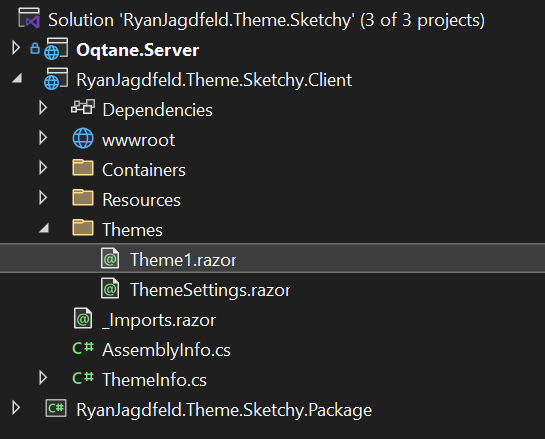
Inside our new solution, we’ll see a couple of projects. We have an Oqtane.Server project, a Client project and a Package project within the same namespace. The Oqtane.Server project is there so we can continue to run Oqtane in our debugger from within this project. The Package project is for packaging up our theme. Our main focus will be within the Client project:

Build and Install Theme
Before our first build, let’s make this project ours by changing out the Bootstrap default CSS with the Bootswatch Sketchy CSS file. Expand the Client project and open the "ThemeInfo.cs" file. Here you will see the imports for the project for Bootstrap. We want to use the Bootswatch theme Sketchy, so let’s change the CSS file location for that.
If you are using a different Bootswatch theme, you can find them all here bootswatch - Libraries - cdnjs
Change the line for the Bootstrap CSS to the Sketchy Bootswatch CSS file
            Resources = new List<Resource>()
            {
		        // obtained from https://cdnjs.com/libraries
                new Resource { ResourceType = ResourceType.Stylesheet, Url = "https://cdnjs.cloudflare.com/ajax/libs/bootswatch/5.3.3/sketchy/bootstrap.min.css", Integrity = "sha512-y4F259NzBXkxhixXEuh574bj6TdXVeS6RX+2x9wezULTmAOSgWCm25a+6d0IQxAnbg+D4xIEJoll8piTADM5Gg==", CrossOrigin = "anonymous" },
                new Resource { ResourceType = ResourceType.Stylesheet, Url = "~/Theme.css" },
                new Resource { ResourceType = ResourceType.Script, Url = "https://cdnjs.cloudflare.com/ajax/libs/bootstrap/5.3.3/js/bootstrap.bundle.min.js", Integrity = "sha512-7Pi/otdlbbCR+LnW+F7PwFcSDJOuUJB3OxtEHbg4vSMvzvJjde4Po1v4BR9Gdc9aXNUNFVUY+SK51wWT8WF0Gg==", CrossOrigin = "anonymous" }

            }
Now, let’s build the project. Select "Debug" from your solution configuration and then build the project (either by right clicking on the solution name in the Solution Explorer and selecting "Build Solution" or select the solution name and press Ctrl + Shift + B:

Once built, go ahead and run the project.

This will launch the Oqtane.Server project. We are still seeing the Bootswatch theme from the Oqtane Bootswatch Theme pack and not our theme just yet. We need to go into the Site Settings from the Admin Dashboard and change the theme to our newly created Sketchy Theme:

Click Save and we are now looking at our very own created theme.
Now that you have built the theme in debug you can also build it in "Release" and the Package project will package it up into a nuget package file for you.
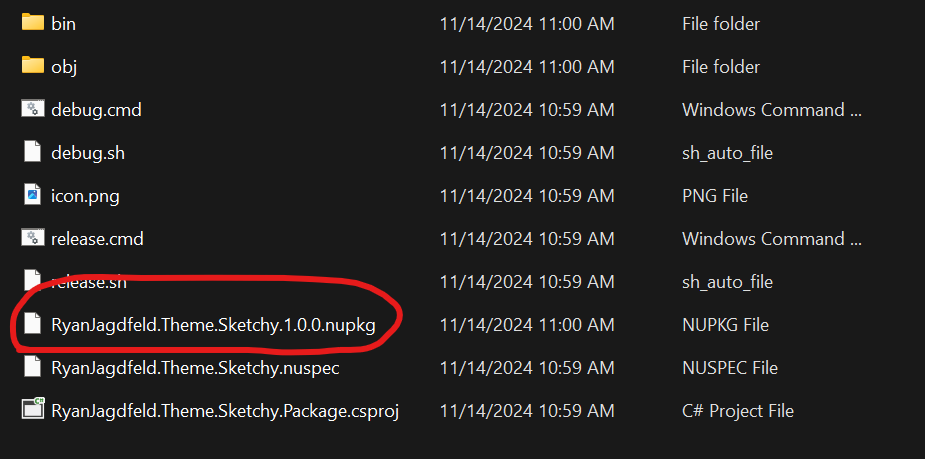
You can upload this file into any instance of Oqtane at the starting version you used in your template or higher.
Adding Custom CSS
Now that we have everything set, let’s add in some customized CSS to make changes to our content, specifically in the Blog. One thing I’m not particularly fond of in this theme is the font-size. I think it’s too small most likely because I’m old and have to zoom the browser to read my own blog. So, let’s first, up the size of the text within the Blog details page using our new theme project and the Theme.css file we now have at our disposal.
Expand the client project, then expand the wwwroot folder, then the Themes folder and finally the folder with your theme name and open the Theme.css file there:
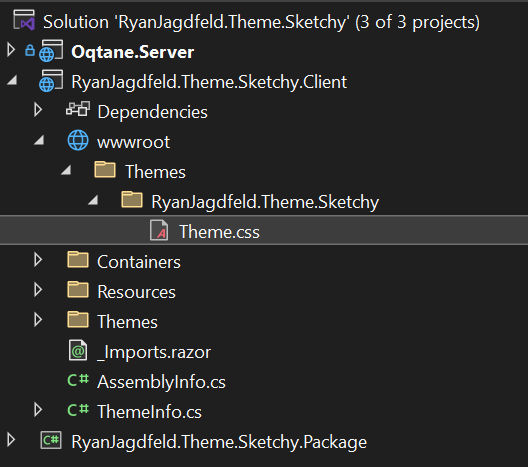
This file is filled with CSS specific to Oqtane. I could increase the font size over all by upping the size in the "body" class, however, this can be bad practice. A lot of UI functionality not found within the content areas of a theme is usually expecting the size of the font to be the size initial set for it by its authors. So, instead, let’s just tell the "content" area that it needs to have a larger font. We’re going to add CSS only for any paragraph text. Before we do that, let’s look at our theme HTML. Open the Theme1.razor file in the Themes folder (in the root of Client, not where the Theme.css file is located).
and notice the "content" CSS class that is in the parent div to all content
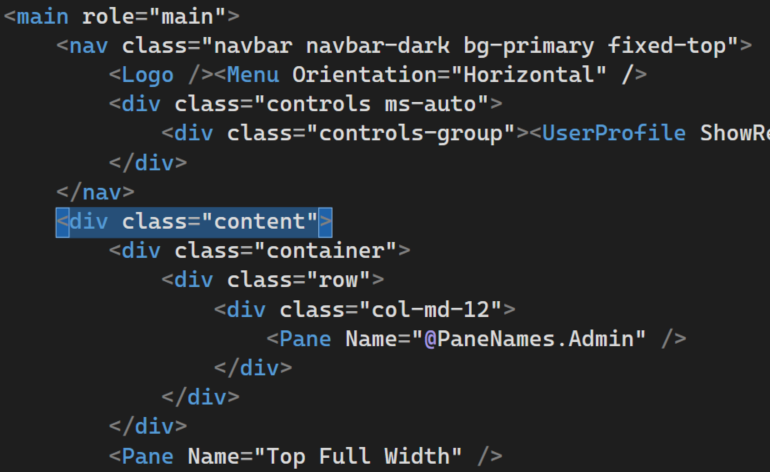
First we add a little code to the Theme.css file:
/* Oqtane Styles */

body {
    padding-top: 6rem;
}

/* Customize Conent */
.content p {
    font-size: 1.25rem;
}
This will increase the text size for all text that is under the .content CSS class in any <p> tag. Build your project again and run.
You may notice that when you make changes to the Theme.css file, you don’t always see the change when you run it. This is most likely caused by your browser caching the file. Usually after you run the project if you don’t see the change, press Ctrl + F5 to reload the page without cache. If you still don’t see the change, make sure you built (or rebuilt) your project files.
Let’s make one more change. The Quill editor in the Blog module adds the .img-fluid class to all images, however, because I’m using code within these blog posts, I’ve turned off the Quill editor and type these posts in raw HTML for the moment (this will be the subject of another post). This can cause some of my IMG tags to display outside of the Bootstrap grid. Long story short, I’ve added a little helper to the Theme.css file to make all images within the content paragraphs to act like img-fluid without applying the class to each image.
/* content image helper */
.content p img {
    max-width: 100%;
}
Conclusion
The theme project template provided by Oqtane makes tasks like these simple and easy for us to development more and have less time messing with the UI. At least that is always our hope, right? You now have your very own theme to do whatever you want with, bound by nothing! This paves the way for you to make your content richly styled. Enjoy!
Share Your Feedback...
Receive Blog Notifications...
© 2024 Ryan Jagdfeld All rights reserved.