Another Developer Blog
Clean Up!
October 18, 2024
Now that we have our blog all set up and we’ve added an article or two, you may notice the out-of-the-box settings, look, well, basic and out-of-the-box. Let’s go over a couple of items that can polish the whole thing up a bit.
Blog Preview
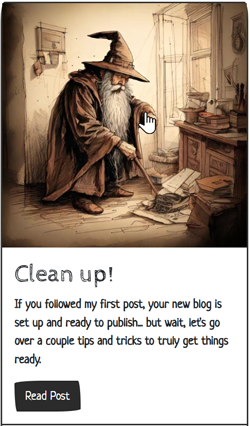
First thing everyone will notice on your new blog is the initial page where we find all of your posts. The preview shows the title and summary inside a grid column in Bootstrap.
Let’s spruce things up a bit using the 
As you can see, it is very basic. I’m going to use the Bootstrap card component to make it look more "modern". First,
let’s look at the example code provided by Bootstrap using their card
component:
To do that, let’s place the tokens into the bootstrap example code. The Oqtane Blog module allows for almost all of the blog’s information to be used as tokens. Tokens are used as placeholders for where we want information to display. Here are all of the tokens you can use in your template:
- [ID]
- [TITLE]
- [SLUG]
- [VIEWS]
- [THUMBNAILPATH]
- [ALTERNATETEXT]
- [THUMBNAIL]
- [CATEGORIES]
- [TAGS]
- [SUMMARY]
- [CONTENT]
- [CREATEDBY]
- [CREATEDON]
- [URL]
- [PUBLISHEDON]
- [PUBLISHEDBY]
- [MODIFIEDON]
- [PUBLISHDAY]
- [PUBLISHMONTH]
- [BLOGNAME]
- [CATEGORY]
- [POST:TITLE]
- [POST:SUMMARY]
To use any one of them, simply place the field name in square brackets and capitalize it. If we want to show the number of views, we put [VIEWS] in the template and that will be replaced with the field value. Let’s put the tokens we want into our Bootstrap card and then save:
        <div class="card">
            [THUMBNAIL]
            <div class="card-body">
                <h2 class="card-title">[TITLE]</h2>
                <p class="card-text">[SUMMARY]</p>
                <a href="[URL]" class="btn btn-primary">Read Post</a>
            </div>
        </div>
In the template we use the token [THUMBNAIL]. Notice how this is not in an <img> tag? That because when you use [THUMBNAIL] the Oqtane Blog module replaces the whole token with the entire <img> to make things easier for us.
NOTE: If you want to create the <img> tag so you can alter its classes and other attributes, you can use the [THUMBNAILPATH] token for the full URL to the image.
Click save and have a look at your article list. If you didn’t add thumbnails to your articles, you should most likely remove the [THUMBNAIL] token from the template.
Stretched Link
Another detail I like when using cards is making the entire card a link to the blog post. How do we do this in Bootstrap? Easy, we use the stretched-link CSS class on the Read More link in our HTML. Open the module settings again and add stretched-link class to the <a> tag.
<a href="[URL]" class="btn btn-primary stretched-link">Read Post</a>Click Save and now you will notice your cursor becomes a pointer when you mouse over anywhere of the preview of the posts. 
Lastly, let’s add a footer to the card and place the date the post was published and the number of views the post has so far into it. To start, let’s add these lines of HTML to the template right after the div with card-body class:
            <div class="card-footer text-body-secondary d-flex">
                <div class="flex-grow-1">[PUBLISHEDON]</div>
                <div class="p-1"><span class="badge bg-dark">[VIEWS]</span></div>
            </div>
We are using the d-flex class which in Bootstrap means it’s display attribute is set to "flex". That helps us tell it to push the date to the left using the flex-glow-1 class, pushing the last div with the number of views to the far right.
Open Iconic
I like to use the "eye" icon or emoji when making something like the "views" and put that inside a badge. The badge is a component of Bootstrap and works nicely here. There is an "eye" icon in the Bootstrap free icon set, however, the Bootswatch theme I’m using, by default, doesn’t add that plug-in to the theme. Lucky for us, Oqtane adds Open Iconic icons globally so all themes can use them. We simply grab the eye icon from the list and paste it into the badge ![]()
Our entire template should now look like this:
        <div class="card">
            [THUMBNAIL]
            <div class="card-body">
                <h2 class="card-title">[TITLE]</h2>
                <p class="card-text">[SUMMARY]</p>
                <a href="[URL]" class="btn btn-primary stretched-link">Read Post</a>
            </div>
            <div class="card-footer text-body-secondary d-flex">
                <div class="flex-grow-1">[PUBLISHEDON]</div>
                <div class="p-1"><span class="badge bg-dark"><span class="oi oi-eye"></span> [VIEWS]</span></div>
            </div>
        </div>
Conclusion
With the Oqtane Blog module you can make your posts look however you would like. Once you start to use the templates, there is a whole world of possibilities out there. Have fun creating! By the way... there is a whole other template for the blog’s post called the details template. Now that you’ve seen what can be done with the HTML templates, have at it. Style that baby up!
Share Your Feedback...
Receive Blog Notifications...
© 2024 Ryan Jagdfeld All rights reserved.