Another Developer Blog
How I Made This Blog
October 11, 2024
I’ve been working lately with a framework called Oqtane that I’m really enjoying. I come from a DNN (formally DotNetNuke) background, using it for everything from building modules and extensions to deployment and installs, configurations, templates, even hosting, you name it. The technology that DNN is built on, WebForms, is being sunset, slowly, but none-the-less, it will be out of support in the next 6 to 10 years. The creator of DNN, Shaun Walker has created this new application framework built in Blazor, Microsoft’s latest front-end web framework, and it works in a very similar way to DNN. This makes it a great choice for someone like me. If you come from a DNN background, you definitely want to check out Oqtane.
Requirements
You will need git installed on your PC and Visual Studio Community or higher.
Clone Oqtane
We start by cloning the Oqtane library right from GitHub. Open a terminal or PowerShell, go to the folder where you want the Oqtane repository cloned to and run
git clone https://github.com/oqtane/oqtane.frameworkOpen Project in Visual Studio
Open the Visual Studio project Oqtane.sln now in the newly created oqtane.framework directory. You will see the project structure to the right. Oqtane has a similar structure to most Blazor applications, be it more complex than most. Build the entire project in Debug or Release it will work either way but does require a build. You are ready to run the project.
NOTE: I usually do all of this in debug, so the debugger shows me any issues
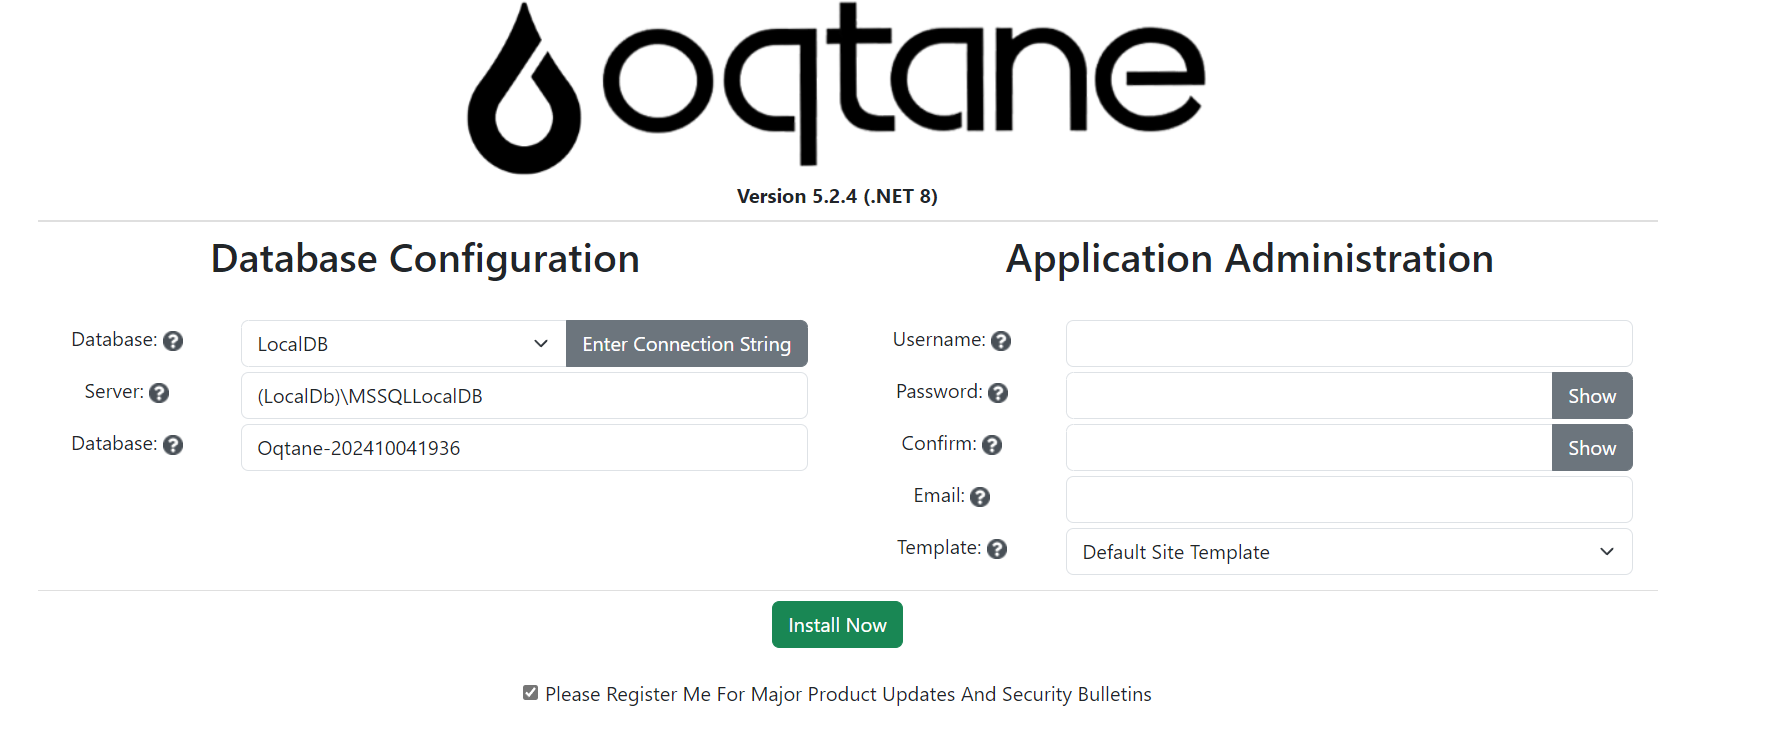
Click run and your browser will open and show the set-up page.
Database Configurations
The database you choose for Oqtane depends on your needs or preferences. You can choose from any of these databases.
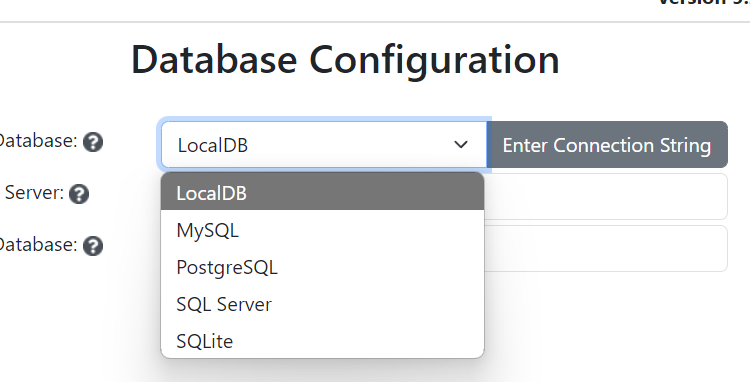
Your choice will either need to be installed on your local machine, or you’ll need to have credentials for a remote DB. Since you have Visual Studio installed, I believe the LocalDB works because SQLLite installs with Visual Studio, if not, you can download it here - SQL Server Express LocalDB - SQL Server | Microsoft Learn. If you are using LocalDB, you can adjust the settings as needed.
I usually just use what it gives me. The database name is something I sometimes change to match a project.
Application Configuration
On the Application Administration section enter a username and password, this will be your "host" user. Enter your email and use the default template (an empty template is for a more advance installation).
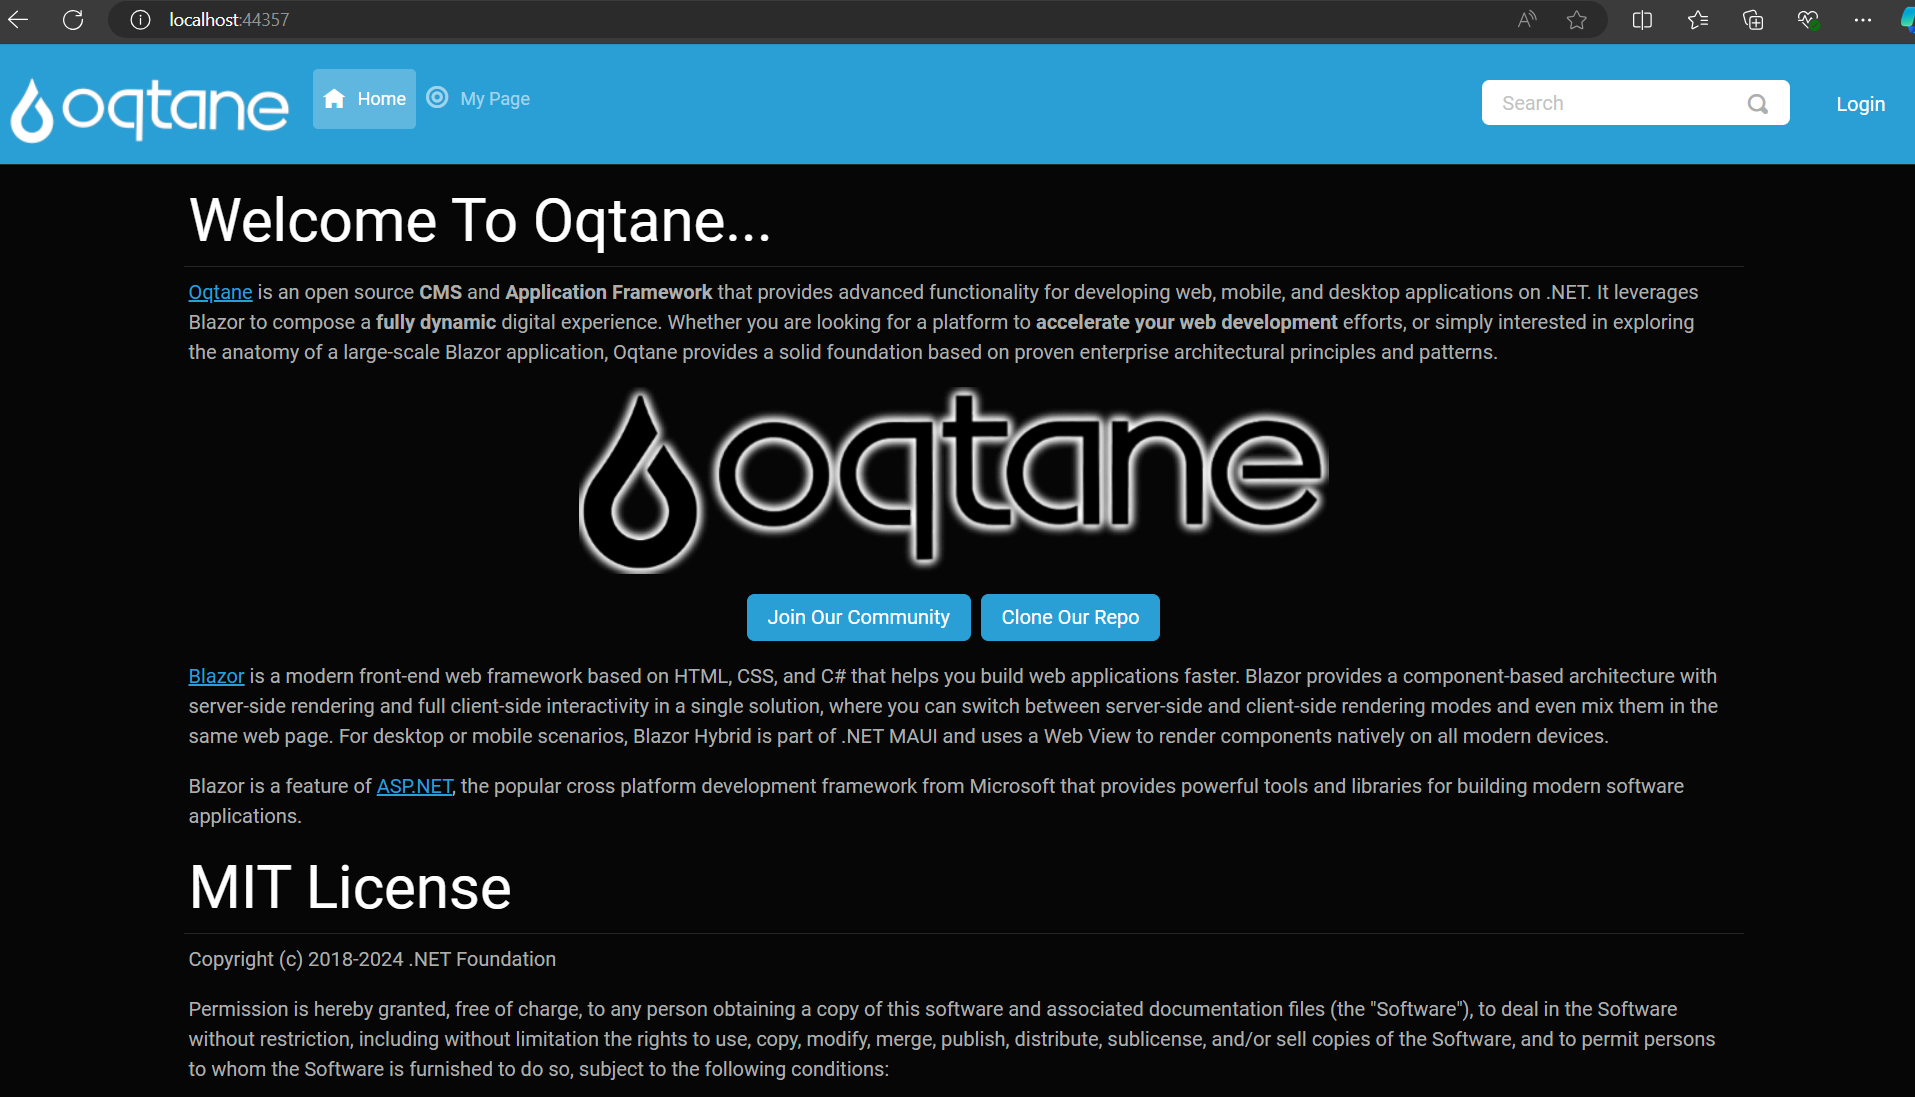
Once installed you will see the home page to your very own instance of Oqtane
Install Theme Pack
Go ahead and login with the login you created. Once logged in, you will have some new options at the top
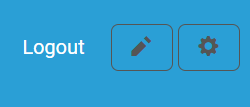
The pencil is to go into edit mode. We’ll get to that in a minute. Click on the gear to open the Control Panel
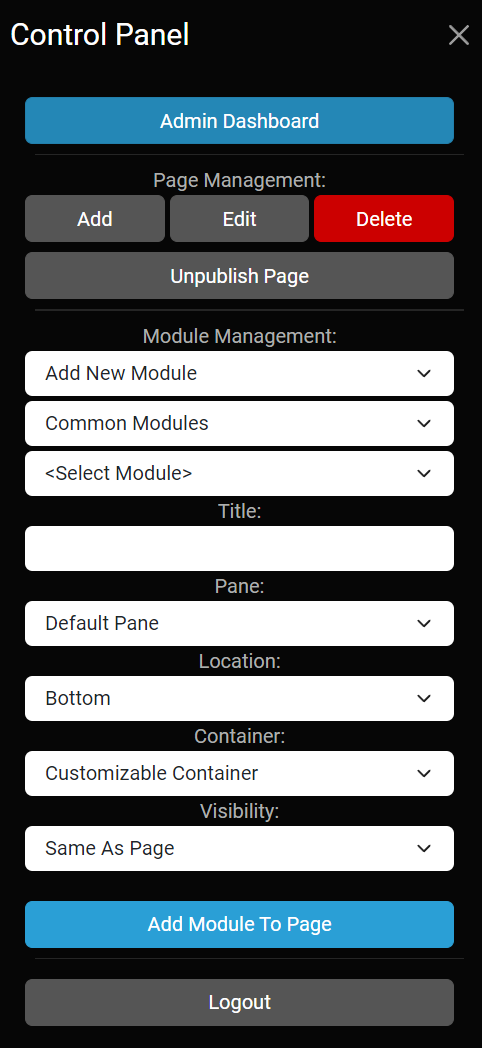
Click on the Admin Dashboard to open it. Here you will see all of your administrative options. The Oqtane framework is LOADED! There is so much leg work done here, I find it really easy to kick up a new app without having to do all of these little things that this framework takes care of for you.
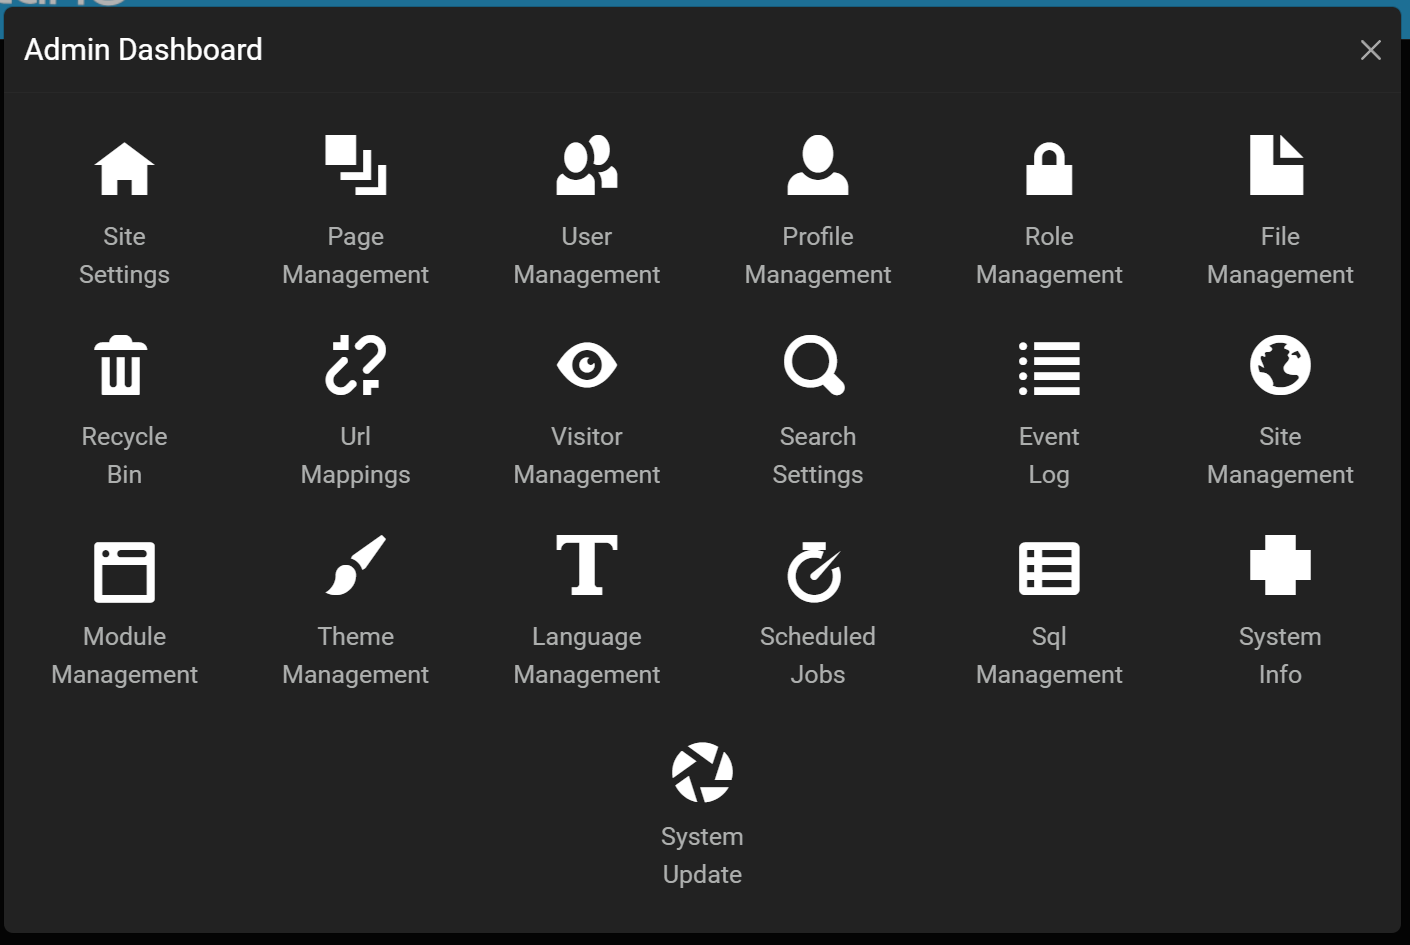
Before we go into the site settings, lets first install a theme pack so when we do go into the site settings, we can start to configure the look of the blog. Click on Theme Management.
Here you will see the two default Themes, Oqtane and Blazor. Click on Install Theme and a box will open to the Marketplace
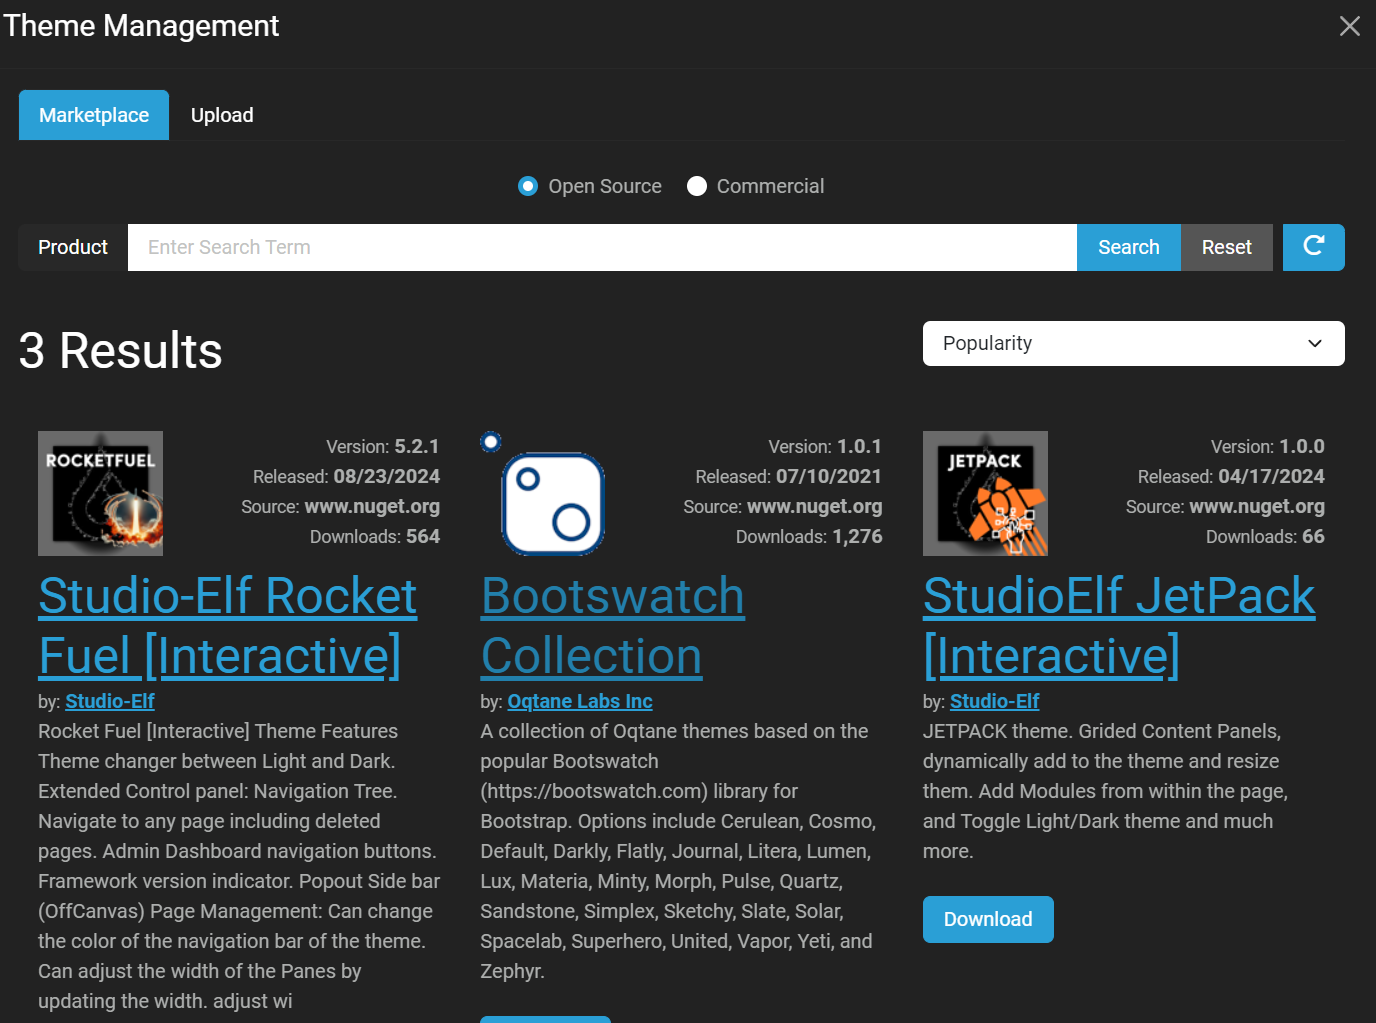
click the Download button below the Bootswatch Collection. The page will refresh, and you will see a message at the top of the Marketplace letting you know a restart is needed.
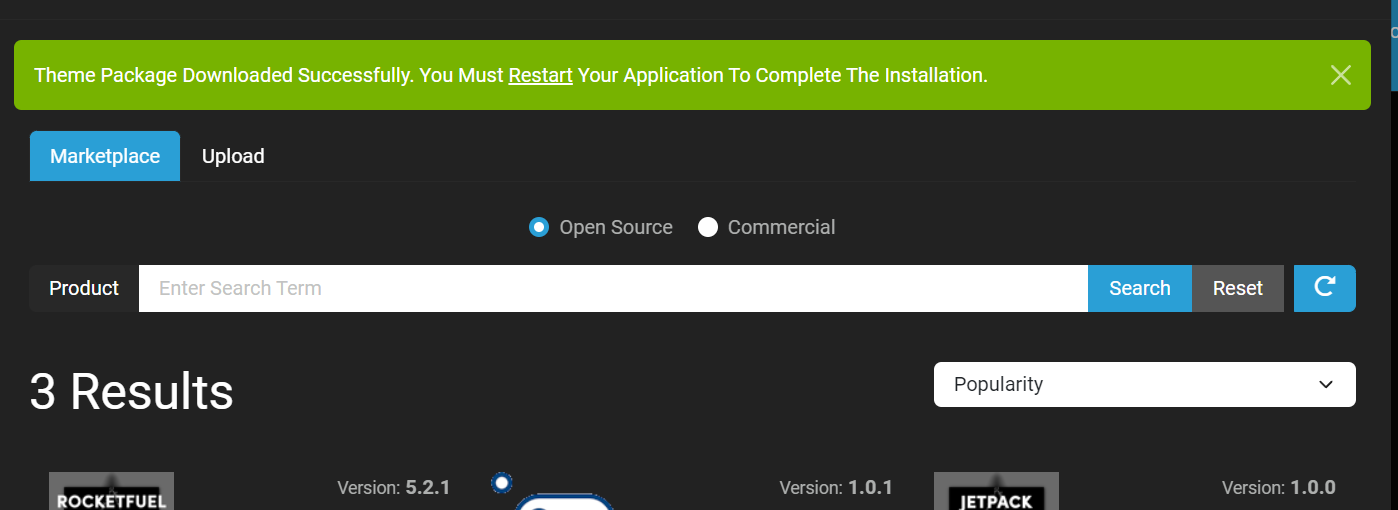
Since we are running locally, I find it easier to now go back to Visual Studio and simply restart the debugger.
Site Settings
Log back into the site if you need to. Open the Admin Dashboard again and this time select Site Settings. Here you will see the main options for your blog.

Open the Default Theme dropdown and you will be presented with a pretty long list of themes for your blog. You can see what each one looks like here - Bootswatch: Free themes for Bootstrap
This particular theme is the Sketchy theme. I like it for its old school notebook style... I’m old school.
Choose the theme you like and click save at the bottom of the page. Have a look around your new website!
Install Blog Module
Now that we have the framework installed and theme chosen, it’s time to add the Blog module. Open the Admin Dashboard again and choose Module Management
![]()
You’ll see a list of the default modules that come with Oqtane just like with the Theme Management page.
At the time of this post the only common module is the Text/HTML module.
Click Install Module and this will open the Module Marketplace. Here you will see a search bar, options for open source and commercial modules
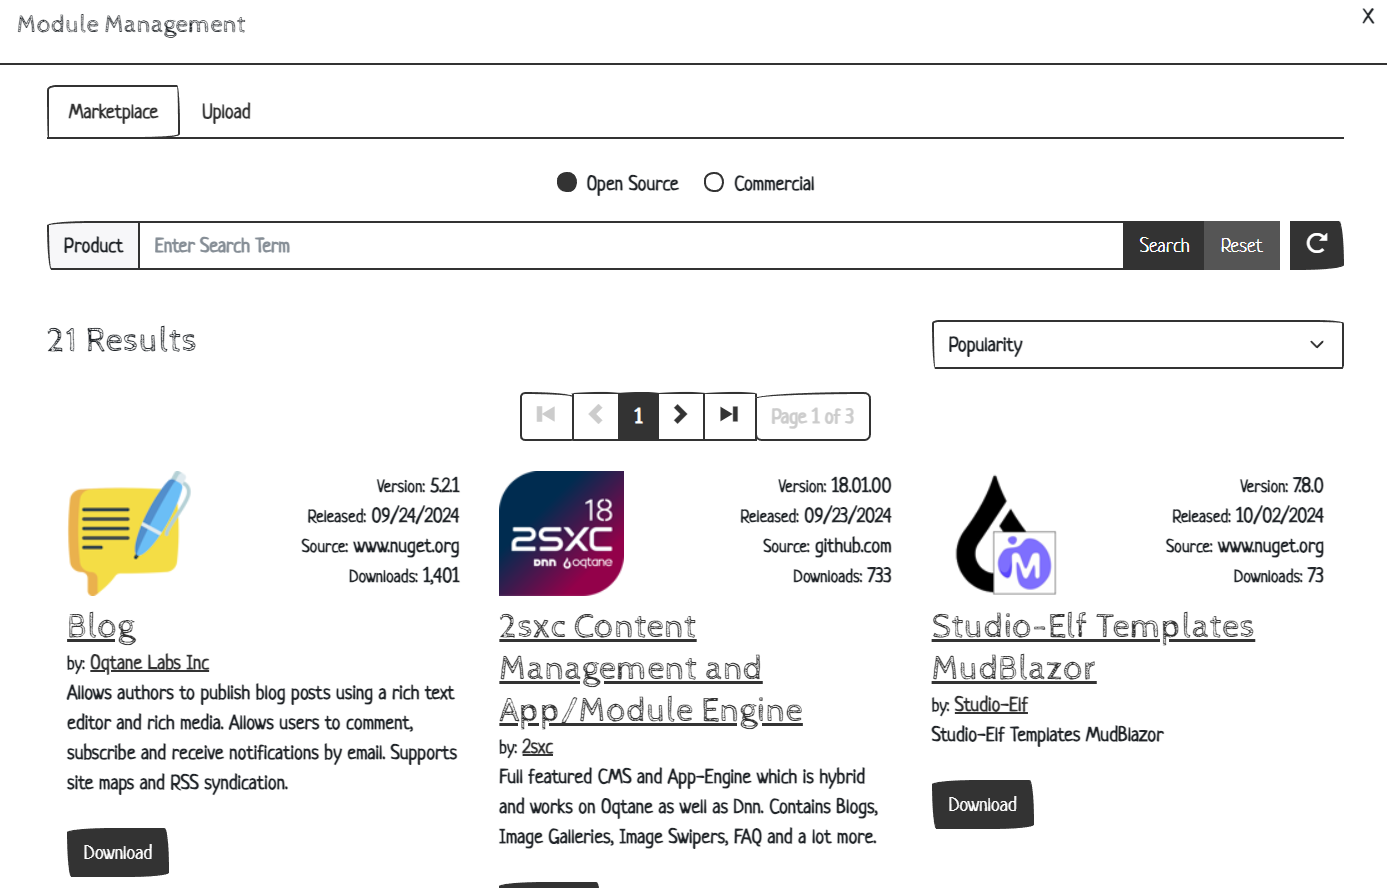
Click on the Download button under the Blog Module by Oqtane. The module will download and again a message will appear letting you know you need to restart before using the new module. Restart the debugger again in Visual Studio and log back into the site if you need to.
Open the Control Panel again and this time, click Add Page. A popup will open in the middle of the page with a form for adding a new page. Enter Blog for the page name. For the parent page, we want our Blog to be on the main navigation to the right of the "Home" page. To do that we need to select "<Site Root>". To place it correctly, choose "After" from the Insert dropdown, then select "Home" from the Page dropdown.
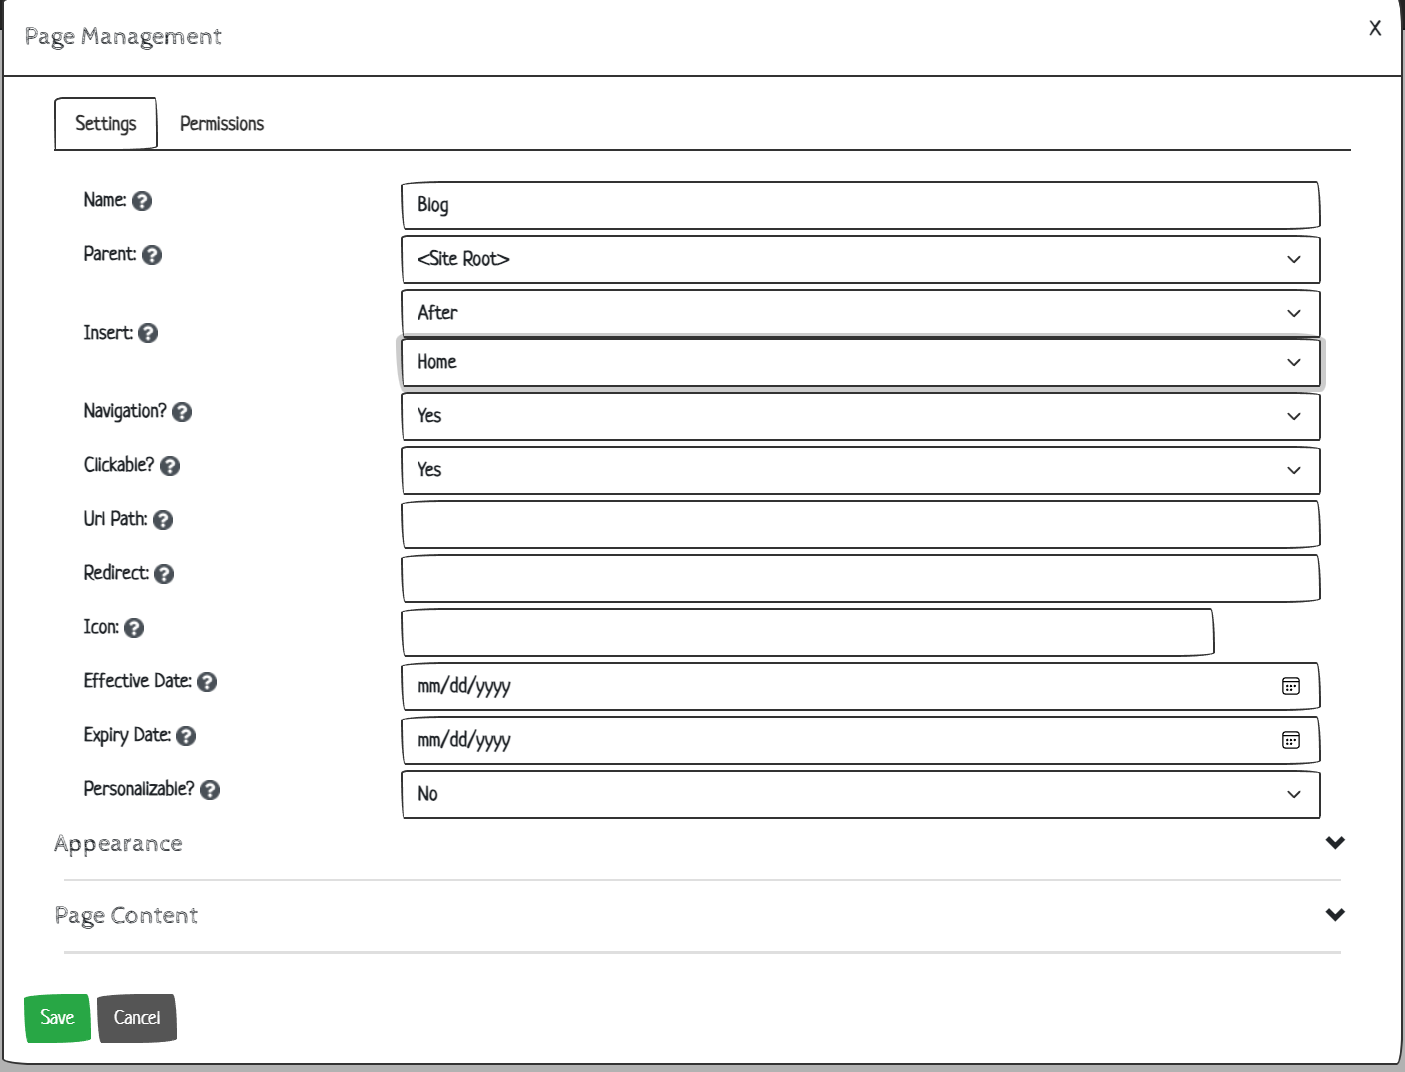
In the Icon field you can pick from lots of icons in the Open Iconic library that is included with the Oqtane framework. Start typing a word of what you would like and then select from the icons listed below. Here is an example of picking the oi-document icon:
![]()
Select the Permissions tab and check the box for "All Users" and "View"
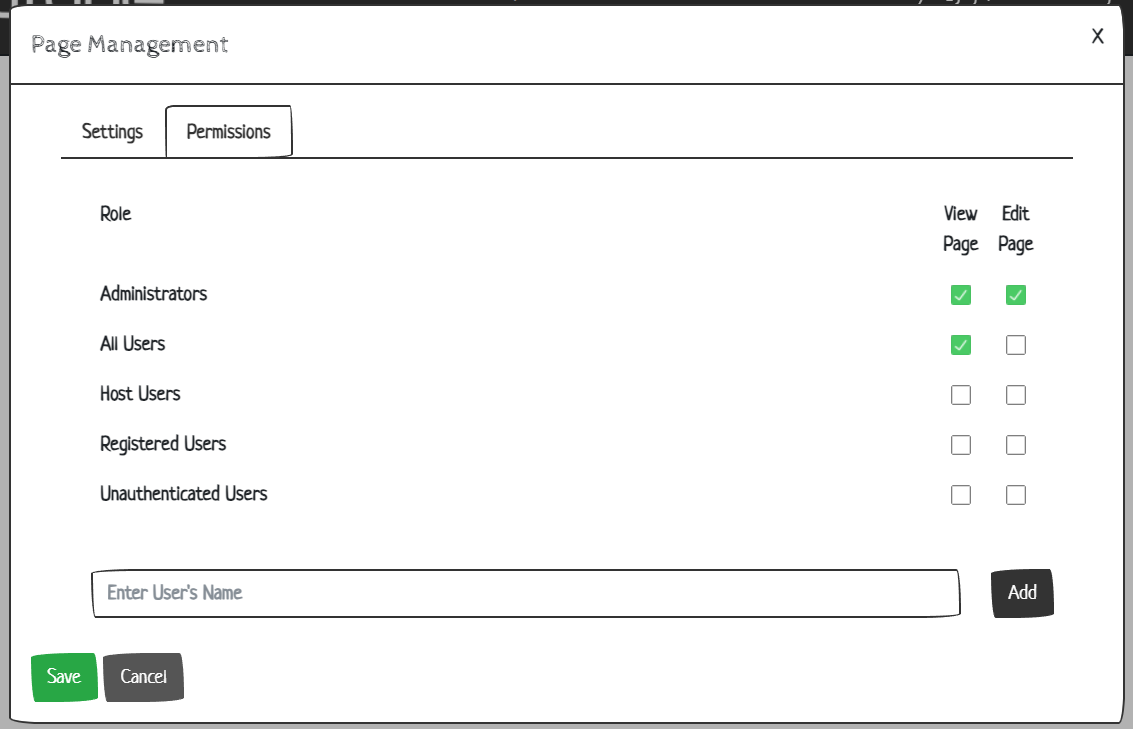
Click Save at the bottom and you will be now on your new page.
In the upper right, click on the Edit Pencil. This places the page into "edit mode". This sort of lifts the curtain up so you can see all of the options for the modules and panes on the page.

This grid shows our options of where modules can be placed.
If you’re not familiar working within this type of grid, keep an eye on my blog for my upcoming post on how to spice up your Oqtane site using just the Text/HTML module.
Open the Control Panel again. In the Module Management section, select Blog from the dropdown. Enter your Blog’s name as the title. For the Pane, I personally like to keep modules in the 100% Panes for most content unless I’m adding side content or need to split content in columns. For this, let’s select the Top 100% Pane. Location doesn’t really matter, there is nothing else on the page yet. There is, so far, only one Container and we want the visibility the "Same as Page" to use those same permissions we set early when we added the page
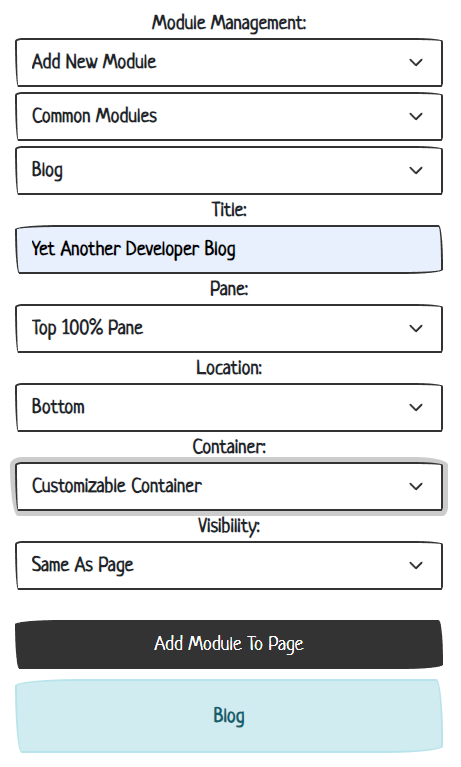
Click Add Module to Page. You will now see the new Blog Module on your page.

Click the edit pencil again in the upper right corner and options will appear in the Blog Module. We could just click on the Add Blog button and start blogging, however, let’s first look at the Blog Module’s settings. Click on the little down arrow in the upper left corner of the module and select Module Settings
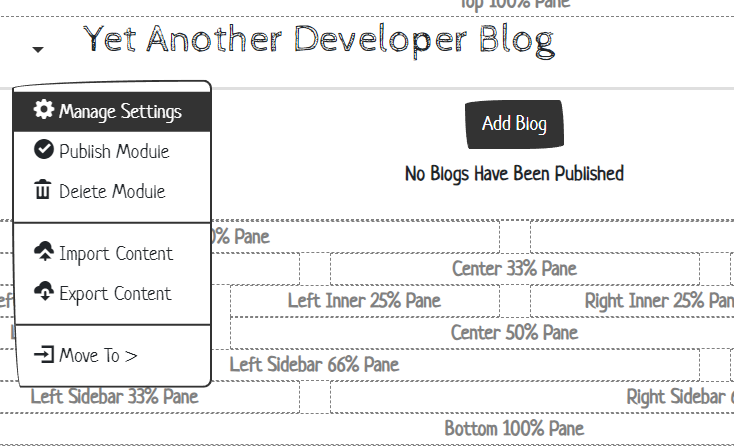
This option is to control this particular module on this page and manage things like its name and other attributes.
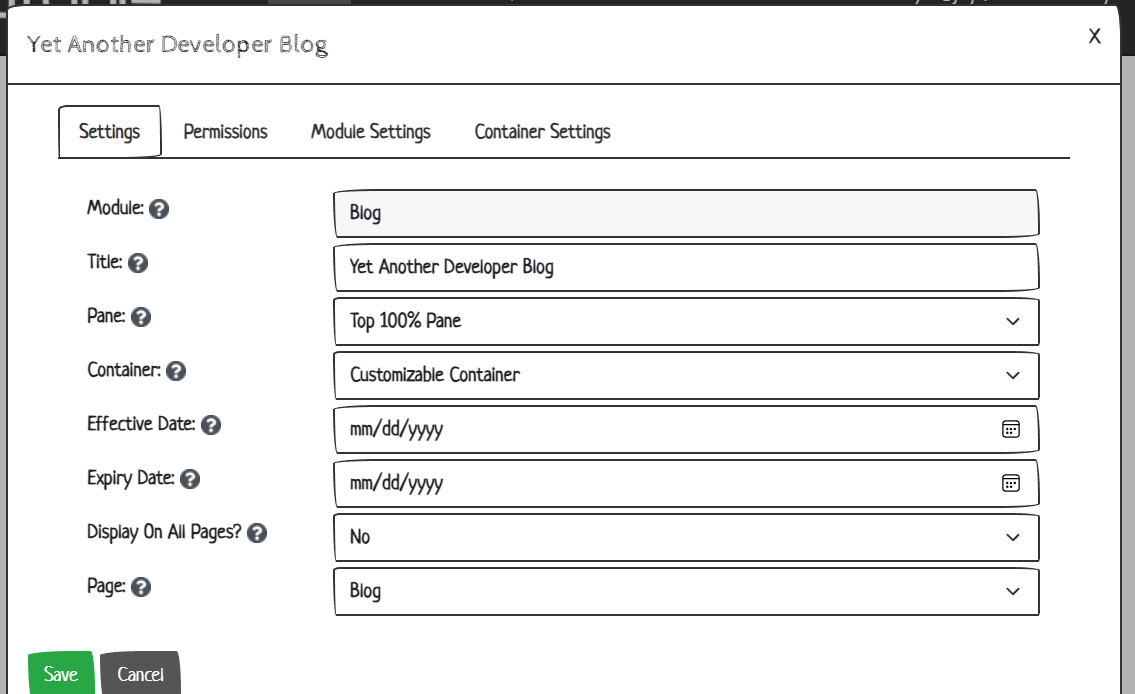
Here, there are options for the module Title, the Pane it’s currently locations in, other options to have the module display itself to the public from an Effective Date until an Expiry date. All sorts of goodies. What we are looking for is the Blog Module settings and those are on the Module Settings tab
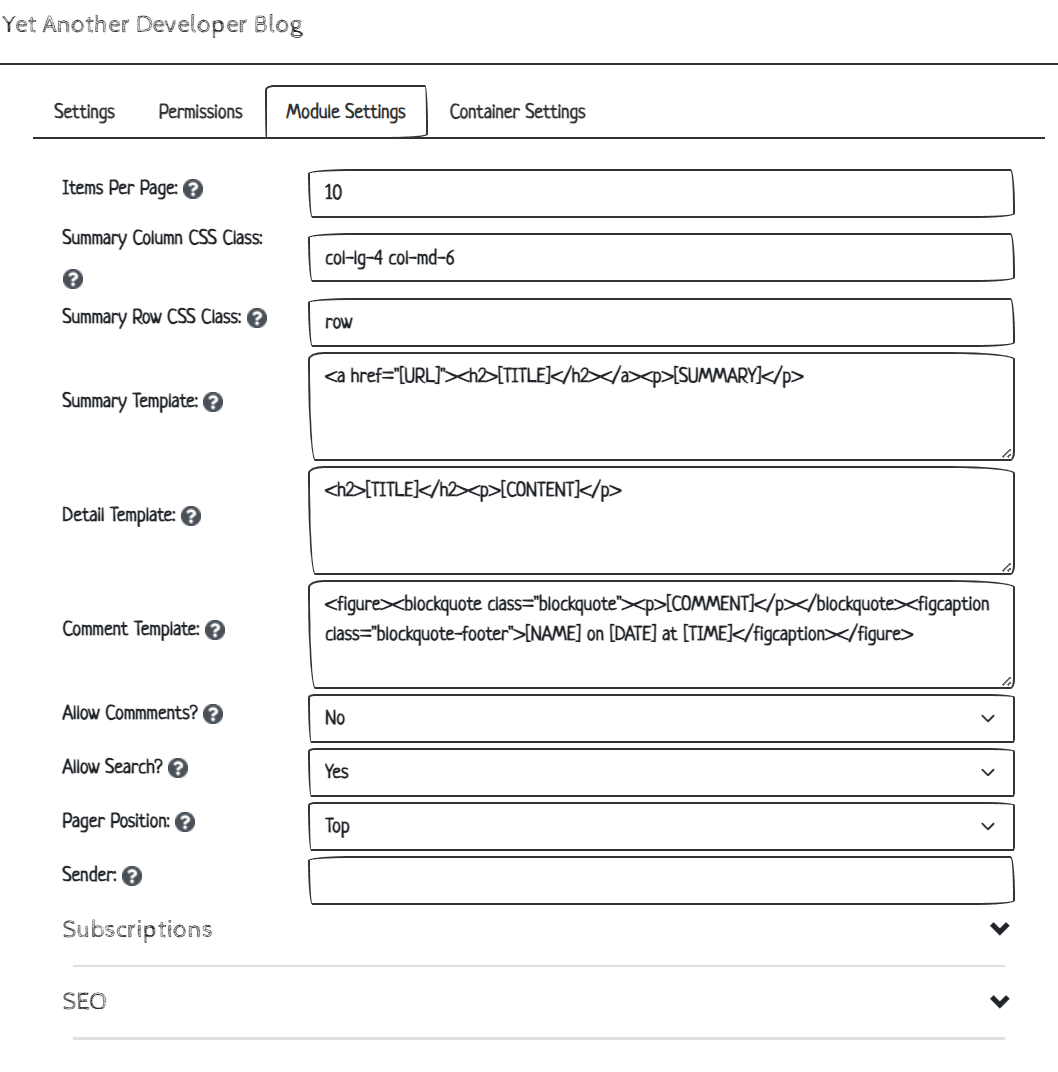
As you can see, there are a lot of options to play with here. We don’t need to change any of this for this example, but I thought it would be a good idea to show you this pretty powerful settings tab. I love that you can change templates for the way the blog items are listed. Click Save when you’re ready to go.
Click the Add Blog button and the future awaits you!
Conclusion
I can’t stop telling people how much I enjoy the Oqtane framework. I have trouble letting go of my DNN roots and I assume there will be some project or library I’ll still have to move out of DNN and into Oqtane right around the time Microsoft is pulling the plug on WebForms. Until that time comes, I’m working hard to learn Blazor and other new technologies that are advancing so quickly. The more I learn, the more I see how it opens worlds of opportunity for a developer like me. I hope it does for you too.
Share Your Feedback...
Receive Blog Notifications...
© 2024 Ryan Jagdfeld All rights reserved.