Another Developer Blog
Build a Module Extension for Oqtane
March 31, 2025
Oqtane is an application framework before it's even a CMS (Content Management System). Yes, you can make it a very good CMS if that is your need, but it can do so much more. In this series of posts, I'm going to go over how to create extensions for Oqtane to give you a sense of how easy it is to build in this framework. I'm going to walk through creating a module for Oqtane that displays a GitHub profile's information. We'll start by going over the requirements for your development environment and using Oqtane's built in module project template.
Here is the GitHub repository for this post
Requirements
To create this extension, we need a few applications installed on our computer.
Our module extension is going to use the GitHub API for requesting info about users.
Note: I'm considering a whole post on just setting up one's development environment to build with Microsoft Blazor and do all these app building processes. If you think this would be a good idea, please leave a comment on this post.
Clone Oqtane
We start, once again, by cloning the Oqtane library right from GitHub. Open a terminal or PowerShell, go to the folder where you want the Oqtane repository cloned and enter the command:
git clone https://github.com/oqtane/oqtane.frameworkOpen the Visual Studio project Oqtane.sln now in the newly created oqtane.framework directory. You will see the project structure on the right. Oqtane has a similar structure to most Blazor applications, be it more complex than most. Build the entire project in Debug and run. This sets up your Oqtane local instance and database.
If you need assistance setting up your local Oqtane, please refer to my first post "How I Made This Blog". You don't need to set up the entire blog, just install Oqtane locally.
Create Extension Project
Now that we have a local instance of Oqtane, we can use it to create a project template for our extension. Think of this as almost the same process when you are using Visual Studio Community to create a new project, and you use a template. It gives you, the developer, all the pieces you may need to get you started building your new app (or in this case, extension). Oqtane's module template has most of what we need to just get coding.
In your newly installed Oqtane instance, open the Admin Dashboard, select Module Management
Then, click "Create Module" at the top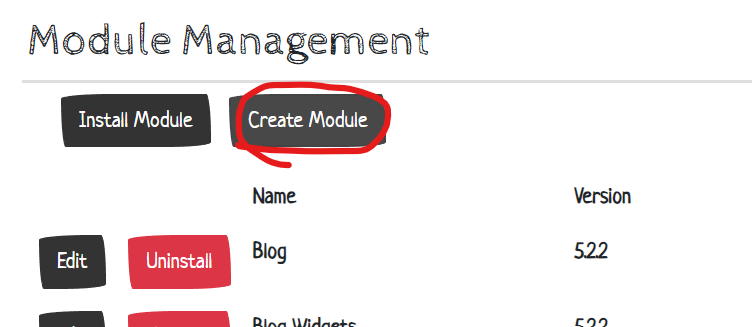
In the form, enter the owner of this new extension, the name for it, give it a brief description, choose the
"Default Module Template" for the template, select "Installed Version" for the reference and its location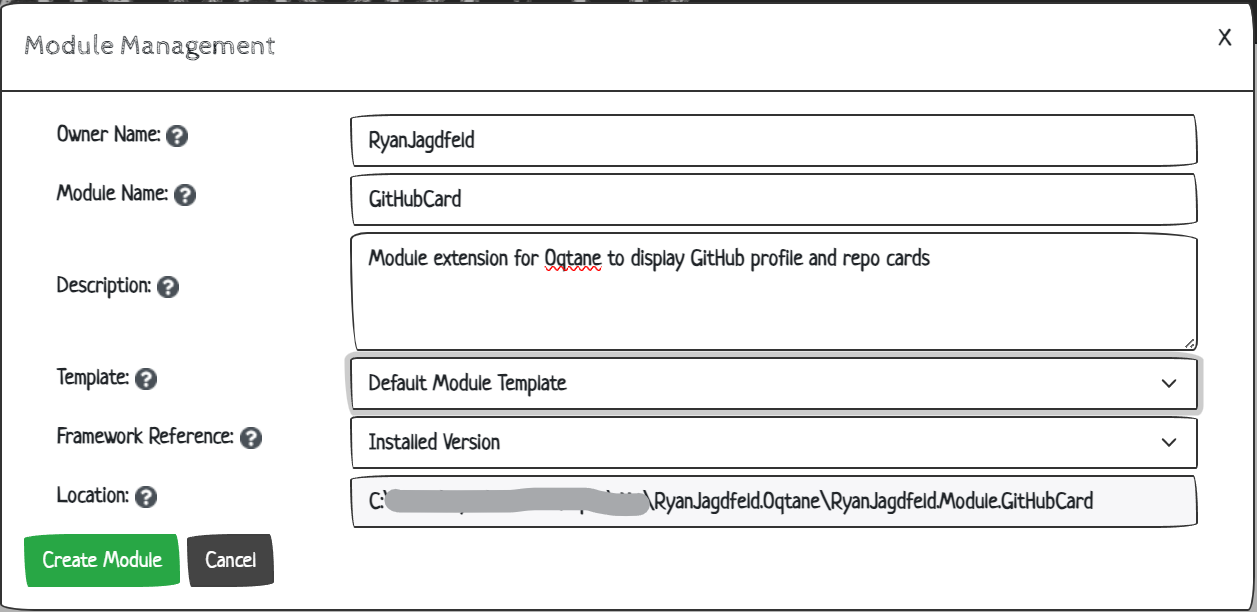
Click "Create Module" at the bottom and boom, your extension now exists in a directory one level up from your
oqtane.framework directory
Note: Unless you have a specific reason, it's best to leave the default location. It's one level up in the directory from your Oqtane project and standard for working with extensions in Oqtane.
Basics of Client/Server Project Scaffolding
Go into the new directory and open the .sln file. 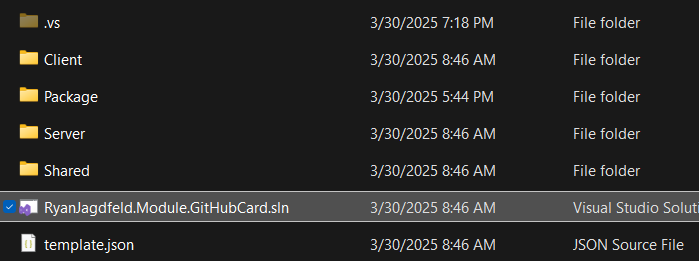
The project will open in Visual Studio. On the right in the
solution explorer windows you will see 5 projects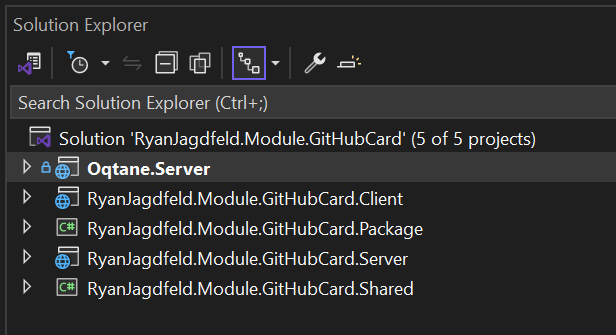
The first one, Oqtane.Server, is a reference to the framework we downloaded, and setup locally and so is
the server app itself. This project is in the solution so you can run your local instance of Oqtane to test and
debug. The client project is for all the code you would like to run on the client's device.
Then there is a package project for packaging up a NuGet package for easy distribution of your extension. A server project for your
extension's
server code and a shared project for all the objects shared between the client project and the server project.
Together these make the solution that is your module extension.
Shared Models & Database EF Migration
We'll start by opening the shared project. The template gives us a starter object using the name of the module as
a shared object to save information to the database and it also includes a database "migration" for it, meaning it
helps us set up our database.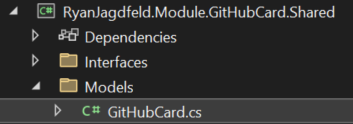
We'll go over the table attribute in a moment. Let's focus on the object's properties first. The template adds an ID field using the name of our module, plus an ID for the module each item pertains to and a name of the object. The other four fields are added so that we may use some tools provided by Oqtane to keep track of who created the item and when it was last modified.
Replace the Name property with Username for storing the GitHub username of the profile we will display
        [Table("RyanJagdfeldGitHubCard")]
        public class GitHubCard : IAuditable
        {
            [Key]
            public int GitHubCardId { get; set; }
            public int ModuleId { get; set; }
            public string Username { get; set; }

            public string CreatedBy { get; set; }
            public DateTime CreatedOn { get; set; }
            public string ModifiedBy { get; set; }
            public DateTime ModifiedOn { get; set; }
        }
The table attribute is used to name the table in the database. This is important because it is used in the Entity
Framework (EF), the underlying database framework from Microsoft that is a huge help with deploying apps and
extensions to apps. It works by having code that installs the database components needed for your extension. In some
Blazor apps, EF sort of codes itself with little interaction from the developer. In Oqtane, the framework supports
multiple types of databases, so this means a little more interaction from the developer. Let's open the Server
project and then the Migration folder and finally the EntiyBuilders folder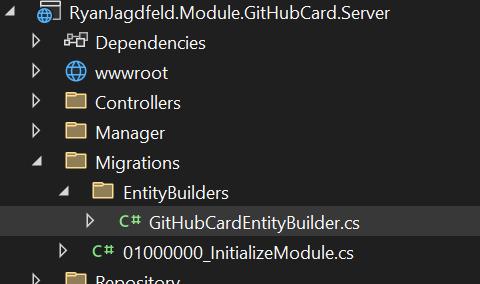
Open the EntityBuilder.cs file for your app, in my case it's called GitHubCardEntityBuilder.cs. This file holds
the instructions for building the database items we need for our module extension. This includes the table and the
columns in the table. The table definition is first. It includes the table name, the primary key and a foreign key
for the moduleId
        private const string _entityTableName = "RyanJagdfeldGitHubCard";
        private readonly PrimaryKey<GitHubCardEntityBuilder> _primaryKey = new("PK_RyanJagdfeldGitHubCard", x => x.GitHubCardId);
        private readonly ForeignKey<GitHubCardEntityBuilder> _moduleForeignKey = new("FK_RyanJagdfeldGitHubCard_Module", x => x.ModuleId, "Module", "ModuleId", ReferentialAction.Cascade);
We can leave the constructor as is, initializing the table and keys. The function BuildTable is where we define the columns and their data types. Here we need to change Name to Username in our table columns like so
        GitHubCardId = AddAutoIncrementColumn(table,"GitHubCardId");
        ModuleId = AddIntegerColumn(table,"ModuleId");
        Username = AddStringColumn(table, "Username", 255);
        AddAuditableColumns(table);
        return this;
The AddAuditableColumns(table) will add the create and modified columns automatically to the table. The new column we just introduced shows an error. This is because we need to define this property below
        public OperationBuilder<AddColumnOperation> GitHubCardId { get; set; }
        public OperationBuilder<AddColumnOperation> ModuleId { get; set; }
        public OperationBuilder<AddColumnOperation> Username { get; set; }
This is all it takes to have our package set up the table, its columns and keys when installed.
When our extension's package is installed, 01000000_InitializeModule.cs file has a function for
running our entity builder called Up and one to uninstall it called Down. This mechanism is then used for database
updates in future releases.
A few more changes we need to make because we've altered our shared object properties is to update the search and
import functions with the username. In the Server project open the GitHubCardManager.cs file in Manager
folder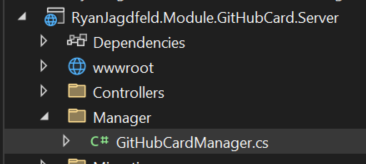
In the GetSearchContentsAsync function you will see our GitHubCard object and the Name field red
underlined because it's no longer an attribute of our class. We have the choice here to update this with the
username if you for some reason are going to need to search this content. However, we are only storing the username
on the server, so that is all we can add to the search. For this example, we're going to simply remove the
function all together. Delete the function, then remove the ISearchable interface from the
class declaration
public class GitHubCardManager : MigratableModuleBase, IInstallable, IPortable
Next change the Name property to Username in the ImportModule function
        public void ImportModule(Oqtane.Models.Module module, string content, string version)
        {
            List<Models.GitHubCard> GitHubCards = null;
            if (!string.IsNullOrEmpty(content))
            {
                GitHubCards = JsonSerializer.Deserialize<List<Models.GitHubCard>>(content);
            }
            if (GitHubCards != null)
            {
                foreach(var GitHubCard in GitHubCards)
                {
                    _GitHubCardRepository.AddGitHubCard(new Models.GitHubCard { ModuleId = module.ModuleId, Username = GitHubCard.Username });
                }
            }
        }
Add GitHubUser Object
The GitHubCard object is our app's object to store the information we want to read from GitHub, however, we want
to get fresh information right from GitHub when the extension is shown on a page in the app. So we need to also
create a GitHubUser class that we will store the information from GitHub's API into. The API call
link returns information about the GitHub user that is public. We will create a class that holds the
attributes we want to display about our users. In the Shared project create a new class in the Models directory named
GitHubUser.cs. Then add these properties
        public class GitHubUser
        {
            [JsonPropertyName("avatar_url")]
            public string AvatarUrl { get; set; }

            [JsonPropertyName("html_url")]
            public string HtmlUrl { get; set; }

            [JsonPropertyName("name")]
            public string Name { get; set; }

            [JsonPropertyName("bio")]
            public string Bio { get; set; }

            [JsonPropertyName("public_repos")]
            public int PublicRepos { get; set; }

            [JsonPropertyName("followers")]
            public int Followers { get; set; }
        }
NOTE: I've only added the properties we are going to use when displaying the GitHub user. As you can see from the link to the GutHub API, there are a lot more properties we could use. You can add any of them to this new GitHubUser object you want to use.
And let's add a GitHubUser to our GitHubCard class in the Shared project in the Models folder. We add the [NotMapped] identifier to the property because this property does not "map" to anything within our database.
        [Key]
        public int GitHubCardId { get; set; }
        public int ModuleId { get; set; }
        public string Username { get; set; }
        [NotMapped]
        public GitHubUser GitHubUser { get; set; }
Controllers & Services
Now that we have our objects and the storage for those objects set, let's go over the services and controllers
for our API. Open the file GitHubCardController.cs in the Controllers folder in the GitHubCardServer
project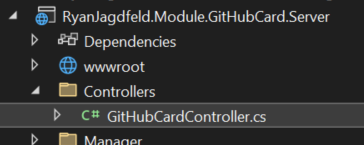
This file is the API controller for our extension and has the basic CRUD operations for our GitHubCard object. Next,
open the GitHubCardService.cs file in the Services folder of the Server project and in the Services
folder of the Client project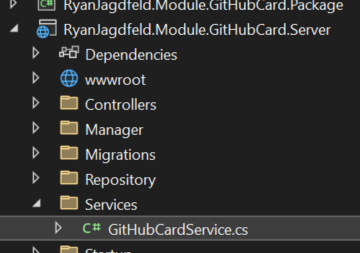
Because both Server and Client projects have this class, there is an interface file
IGitHubCardService.cs in the Shared project
The services communicate with the API controller. We don't need to make changes to the controller or services
for our GitHubCard object. The template we used to create this extension did all of that for us. We do need to
create a
service to call GitHub's API to get the user information.
Add a New GitHub Service
In the Services folder of the Shared project, create a new interface called IGitHubService.cs. This interface will be for the GitHubService class that will be used to call the GitHub API and retreive the user information. It only needs one function to call the API and store the information in our GitHubUser object.
        public interface IGitHubService
        {
            Task<GitHubUser> GetGitHubUserAsync(string username);
        }
Next, create a new class in the Client project in the Services folder for the GitHubService
        public class GitHubService : IGitHubService
        {
            private readonly HttpClient _httpClient;

            public GitHubService(HttpClient httpClient)
            {
                _httpClient = httpClient;
                _httpClient.DefaultRequestHeaders.Add("User-Agent", "GitHubCardApp");
            }

            public async Task<GitHubUser> GetGitHubUserAsync(string username)
            {
                var url = $"https://api.github.com/users/{username}";
                var response = await _httpClient.GetAsync(url);

                if (response.IsSuccessStatusCode)
                {
                    return await response.Content.ReadFromJsonAsync<GitHubUser>();
                }
                else
                {
                    // Handle different status codes as needed
                    if (response.StatusCode == System.Net.HttpStatusCode.NotFound)
                    {
                        // Handle 404 Not Found
                        throw new HttpRequestException($"User {username} not found.");
                    }
                    else
                    {
                        // Handle other errors
                        throw new HttpRequestException($"Request to GitHub API failed with status code {response.StatusCode}.");
                    }
                }
            }
        }
Finally, we need to add this service to the scope of our Client project. Open the ClientStartup.cs file
in the Client project under the StartUp folder and add the service to the services collection like so
        public void ConfigureServices(IServiceCollection services)
        {
            services.AddScoped<IGitHubCardService, GitHubCardService>();
            services.AddScoped<IGitHubService, GitHubService>();
        }
Module Views
Now that we have our API and services setup, we need to create the views for our extension. In the Client project,
under the Modules folder you will see a folder for your GitHubCard
module. This folder holds our Index, Edit and Settings views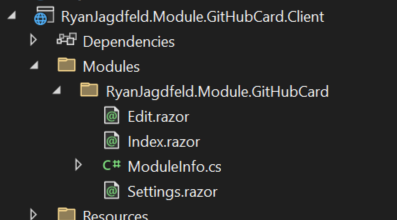
There is also a class for your module's ModuleInfo that holds the information about the module. The Index view
is the view that will be displayed on the page when the module is added to it. The Edit view is used to edit module
objects, and the
Settings view is used to edit the module's settings.
Let's start with the Edit. This is easy to work with because the template had the one object property "Name" and we are simply renaming it to "Username".
        <div class="container">
            <div class="row mb-1 align-items-center">
                <Label Class="col-sm-3" For="username" HelpText="Enter the GitHub Username" ResourceKey="Name">GitHub Username: </Label>
                <div class="col-sm-9">
                    <input id="username" class="form-control" @bind="@_username" required />
                </div>
            </div>
        </div>

    ...

        private ElementReference form;
        private bool validated = false;

        private int _id;
        private string _username;
        private string _createdby;
        private DateTime _createdon;
        private string _modifiedby;
        private DateTime _modifiedon;

    ...

        if (GitHubCard != null)
        {
            _username = GitHubCard.Username;
            _createdby = GitHubCard.CreatedBy;
            _createdon = GitHubCard.CreatedOn;
            _modifiedby = GitHubCard.ModifiedBy;
            _modifiedon = GitHubCard.ModifiedOn;
        }

    ...

        private async Task Save()
        {
            try
            {
                validated = true;
                var interop = new Oqtane.UI.Interop(JSRuntime);
                if (await interop.FormValid(form))
                {
                    if (PageState.Action == "Add")
                    {
                        GitHubCard GitHubCard = new GitHubCard();
                        GitHubCard.ModuleId = ModuleState.ModuleId;
                        GitHubCard.Username = _username;
                        GitHubCard = await GitHubCardService.AddGitHubCardAsync(GitHubCard);
                        await logger.LogInformation("GitHubCard Added {GitHubCard}", GitHubCard);
                    }
                    else
                    {
                        GitHubCard GitHubCard = await GitHubCardService.GetGitHubCardAsync(_id, ModuleState.ModuleId);
                        GitHubCard.Username = _username;
                        await GitHubCardService.UpdateGitHubCardAsync(GitHubCard);
                        await logger.LogInformation("GitHubCard Updated {GitHubCard}", GitHubCard);
                    }
                    NavigationManager.NavigateTo(NavigateUrl());
                }
                else
                {
                    AddModuleMessage(Localizer["Message.SaveValidation"], MessageType.Warning);
                }
            }
            catch (Exception ex)
            {
                await logger.LogError(ex, "Error Saving GitHubCard {Error}", ex.Message);
                AddModuleMessage(Localizer["Message.SaveError"], MessageType.Error);
            }
        }
Next is the Index.razor file. We want to do a little more than just change the property Name to Username. We also want to style it to look like a profile card. First let's change any reference of "Name" to "Username" so that we can build our module and run it to see what it looks like initially.
<Pager Items="@_GitHubCards">
<Header>
<th style="width: 1px;"> </th>
<th style="width: 1px;"> </th>
<th>@Localizer["Name"]</th>
</Header>
<Row>
<td><ActionLink Action="Edit" Parameters="@($"id=" + context.GitHubCardId.ToString())" ResourceKey="Edit" /></td>
<td><ActionDialog Header="Delete GitHubCard" Message="Are You Sure You Wish To Delete This GitHubCard?" Action="Delete" Security="SecurityAccessLevel.Edit" Class="btn btn-danger" OnClick="@(async () => await Delete(context))" ResourceKey="Delete" Id="@context.GitHubCardId.ToString()" /></td>
<td>@context.Username</td>
</Row>
</Pager>
Before we can build it, there is one more reference to the Name property in the client Service. Like the GitHub
service we created early to read the information from GitHub by the username, our module loads GitHubCards
from the database by using a service. Open the GitHubCardService.cs file found in the Services directory of the
client project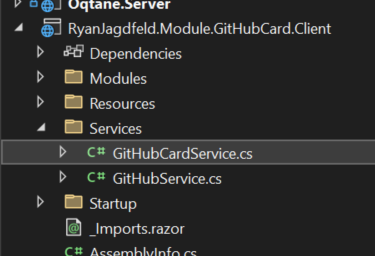
Change the reference for Name to Username in the GetGitHubCardsAsync function
        public async Task> GetGitHubCardsAsync(int ModuleId)
        {
            List GitHubCards = await GetJsonAsync>(CreateAuthorizationPolicyUrl($"{Apiurl}?moduleid={ModuleId}", EntityNames.Module, ModuleId), Enumerable.Empty().ToList());
            return GitHubCards.OrderBy(item => item.Username).ToList();
        }
You may now build your solution. Build it in debug and then run it

Login, and in the control panel, add a new GitHubCard module to the home page: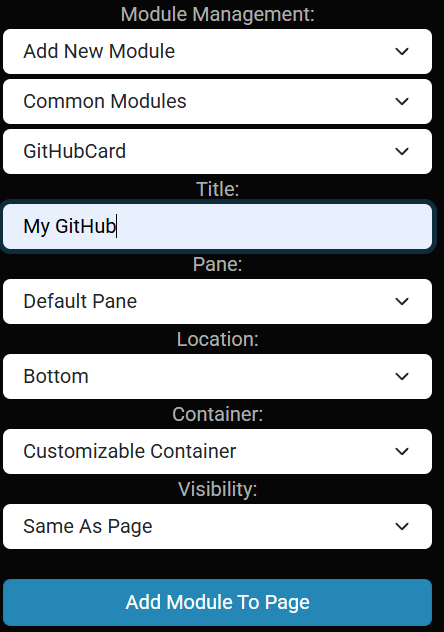
Click the "Add Module" button and you will now see your new module now on the page. Select Add GitHubCard and you
will see your edit form popup with a textbox to enter the GitHub username. Enter a username and click
Save.
You'll see the username you entered with a Edit and Delete button next to it. 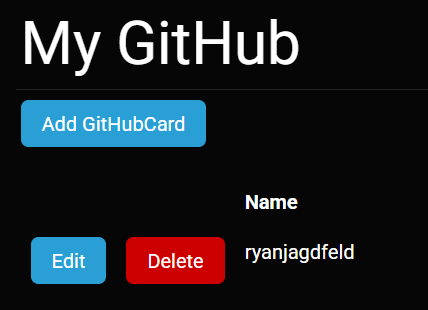
You can add more username or remove/edit any of those on the list, however, we are still not calling our
GitHubService, so we are only seeing what we are holding in our database table. Stop the running process and go back
to the Index.razor file. We want to add in a call to the GitHubService and display the returned information in our
GitHubUser object.
We're going to need to inject the GitHubService we created at the top of the Index.razor file
@inject IGitHubService GitHubService
We still want to use the Pager component to display the cards, however, let's change it to an actual "card" using the Bootstrap and add in the fields we'd like to display from the GitHubUser. Change the Pager attributes to use the Grid format and assign classes to create the "cards".
<Pager Items="@_GitHubCards" Format="Grid" Class="container" RowClass="row" ColumnClass="col-lg-6 px-sm-5">
    <Row>
        @if (context.GitHubUser != null)
        {
            <div class="m-sm-3 mw-md-50">
                <div class="card p-2 my-2">
                    <div class="row">
                        <div class="image col-md-6">
                            <img src="@context.GitHubUser.AvatarUrl" class="img-fluid rounded">
                        </div>
                        <div class="col-md-6">
                            <h3 class="mb-0 mt-0 card-title txt-nowrap">@context.GitHubUser.Name</h3>
                            <div class="p-2 mt-2 card-text">
                                @context.GitHubUser.Bio
                            </div>
                            <div class="p-2 mt-2 bg-primary d-flex justify-content-center text-white">
                                <div class="px-2 d-flex flex-column">
                                    <span>Repos</span>
                                    <span class="text-center">@context.GitHubUser.PublicRepos</span>
                                </div>
                                <div class="px-2 d-flex flex-column">
                                    <span>Followers</span>
                                    <span class="text-center">@context.GitHubUser.Followers</span>
                                </div>
                            </div>
                            <div class="button mt-2 d-flex flex-row align-items-center">
                                <a href="@context.GitHubUser.HtmlUrl" class="btn btn-primary w-100 ml-2 stretched-link" target="_blank">Follow</a>
                            </div>
                        </div>
                    </div>
                </div>
            </div>
        }
        <div class="m-auto">
            <ActionLink Action="Edit" Parameters="@($"id=" + context.GitHubCardId.ToString())" ResourceKey="Edit"  />
            <ActionDialog Header="Delete GitHubCard" Message="Are You Sure You Wish To Delete This GitHubCard?" Action="Delete" Security="SecurityAccessLevel.Edit" Class="btn btn-danger" OnClick="@(async () => await Delete(context))" ResourceKey="Delete"  Id="@context.GitHubCardId.ToString()" />
        </div>
    </Row>
</Pager>
In the OnInitializedAsync function add in a foreach loop to make a call to GitHub for each user we are going to display:
        foreach (var gitHubCard in _GitHubCards)
        {
            var gitHubUser = await GitHubService.GetGitHubUserAsync(gitHubCard.Username);
            if (gitHubUser != null)
            {
                gitHubCard.GitHubUser = gitHubUser;
            }
        }
Build and run and you will now see your GitHubCards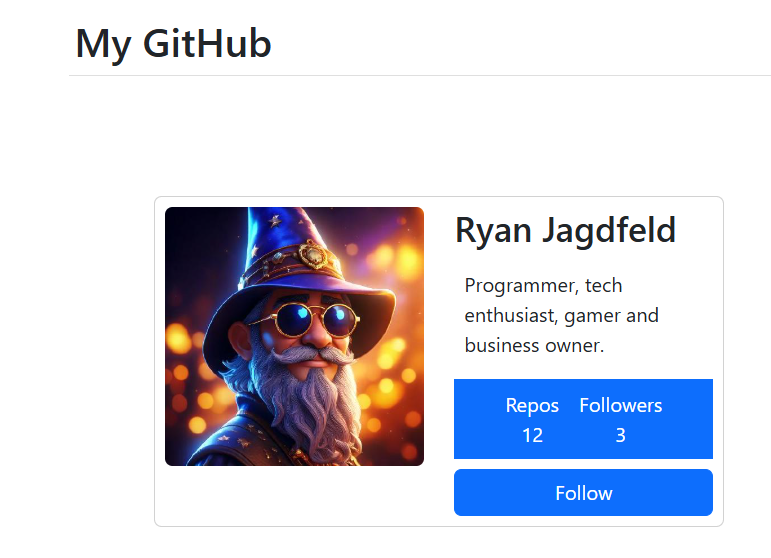
Packaging
Now that we have our extension built, we need to pack it up for distribution. The Oqtane template we create our module with has a
Package project in it. When we build our project in Release, this Package project creates a NuGet package for us. This
package is a zip file that contains all the files needed to install our extension in another Oqtane instance. The
package is created right in the project folder of the Package project. You can find the package file with a name
like RyanJagdfeld.Module.GitHubCard.1.0.0.nupkg. This file is what you will use to install your
extension in other Oqtane instances.
Conclusion
We now have a functioning extension in Oqtane. Our extension can be packaged and used on any Oqtane instance with a version equal to the template you used to create your module in or higher. There are some obvious caveats. If you ran the testing too many times you might come across an error from GitHub letting you know your device has gone past the expectable number of requests for the user data within a period. In my next post I'm going to go over various ways we fix this as well as adding Module settings into our extensions. Please feel free to leave a comment with any questions or thoughts you may have about creating modules within Oqtane.
Share Your Feedback...
Receive Blog Notifications...
© 2024 Ryan Jagdfeld All rights reserved.